Final exams are finally over, say goodbye to freshman year and hello to the sophomore year :) let's start the holiday with this ultimate nachos top with loads of toppings. My mouth is salivating as I'm writing this because it was so good. Mexican food is not widely here in Thailand so there are only a few Mexican restaurants in my city. So I think why not making it at home? it's not that complicated. That is the beginning of my love of Mexican food. 


It's quick, it's fresh, it's delicious. What else do I need to explain it's just too good to resist.


Recipes

chillies

500 grams ground beef and ground chicken mixer  ( you can use any proteins you like I just happened to have these two on hand )
1 medium onion
2 clove garlic
1 heap teaspoon chili powder
1 heap teaspoon smoked paprika
1 heap teaspoon cumin
1 teaspoon cinnamon
1 can chopped tomato 
1 teaspoon sugar
salt and pepper

additional: add red chili if you want a little spicy kick in the chili and you can add more spices if you think it's bland :)

heat the medium saucepan with 2-3 tablespoon of oil then add the chopped garlic and onion, cook until it softens then add all the spices, chili powder, paprika and cumin ( you can use store-bought taco seasoning as well ) then add the mixer of meats and cook it until brown. Pour the whole can of chopped tomato and mixing it. let it simmer on a stove for about 30-40 minutes it will become thicker. And it's ready to be served :) 


Pico De Gallo or tomato salsa

2 tomatoes
1 small red onion
1-2 tablespoon oil
1 lime 
salt & pepper 
a handful of cilantro 

Chop tomatoes and red onion into bite-size pieces or big chunks if you prefer ;) then mix them with oil, salt, and pepper to taste and chop the cilantro and add it at the end.

200 grams of nachos( but really, you can use as much or as little )

you can omit the cheese if you want it to be a bit more healthy 

top it with a dollop of sour cream and cilantro as a garnish 


There is one thing I always love .. Breakfast ! .. that's right , who doesn't like breakfast. I am always making myself a proper breakfast every weekend because I'm not in a hurry to go to school so I have time to make something I feel great eating it. 


I believe in this quote
'all happiness depends on a leisurely breakfast' 


What are you waiting for ! go make yourself a lovely breakfast and you don't have to worry what time it is , breakfast is an all-day meal you can eat it whenever you want , I personally like eating at midnight :)

  
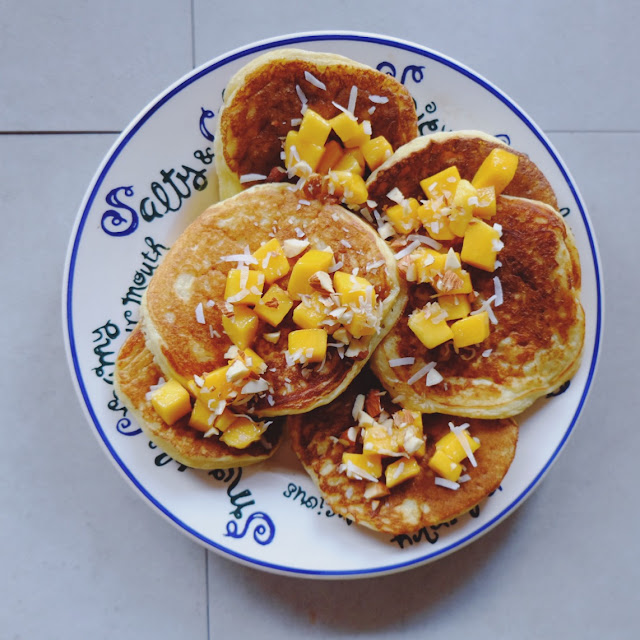
Crepes or pancakes? I still don't know what to call these guys. Some British call it pancakes which is confusing me a bit but that's the beauty of language, isn't it? As long as everyone enjoys eating whatever this is called. 


You can make it in many possible ways but today I made simple standard crepes. You can make a sweet one like mine, put some berries on top, spread some Nutella, peanut butter or jam, sprinkle with some nuts or seeds and dust with icing sugar to make it fancy.


Or you can make a savory one with an egg, mushroom, ham ... 
you name it!


I used Entertaining with Beth's crepe recipe

Ingredients

1 cup (120 g) of All Purpose Flour

1 tbsp (13 g) sugar

pinch of salt
2 eggs, beaten well
2 cups (475 ml) of milk
4 tbsp (60 ml) melted butter

instructions

1 whisk together the flour, sugar, and salt in a bowl, then pour in the milk and whisk follow with the beaten egg and the melted butter, whisk until all combined. 

2 Using non-stick pan will giving the best result, grease a thin layer of oil using and heat the pan on a medium heat.

3 ladle out 1 ladle of the batter, tilt the pan to swirl the batter around until it completely covers the bottom of the pan. 

4 Once the batter looks dry and the edges begin to turn golden brown, use a long spatula and slide it under the crepe, gently grab it with your hands and flip!

5 cook 1-2 more minute, then top them off with toppings that your heart desire!


On my free time, I love to look for a new inspiration to cook or bake on Pinterest. I found this recipe and I thought I give this a try! because it's so easy and requires only two ingredients which I have on hand. 

It sounds very crazy, doesn't it? making cookies with only bananas and oats but it actually worked it's edible (haha) I love it, it's like guilt-free cookies that you can have anytime you want or crave something sweet at midnight like I always do.


Ingredients
2 bananas ( ripe -> has more sweetness because we don't add any additional sugar in this recipe )
1 cup quick-cooking oats 

optional: 1 Tbsp chia seed , 4 Tbsp mini dark chocolate chips 

Instructions
1. mash bananas until it's mushy. 
2. add oats and stir it until combined ( I added chocolate chips to make it more delicious and chia seed because I wanted to (haha).
3. scoop the mixture about a tablespoon size of the ball and place it on the baking sheet. Make sure to FLAT them because they're not going to spread like normal cookies.
4. bake them at 180C about 6-8 minutes.


I love Rice Krispie Treats, but it's quite hard to find in Thailand well it's only available in a big grocery. So I think it would be great to share this recipe even though it is too easy to say its a recipe. But I can assure you that this treat is very addictive and simple to make. Everyone will love these for sure. 


This treat is so good! it's gooey, marshmallowy, chewy, crispy 


To be honest one bar isn't enough for me, it's too good and I can't stop eating them.


You can add anything you want apart from the recipe: You can add nuts, dried fruits, chocolate chips, M&Ms, sea salt, sprinkles ... The possibility is endless! But today I keep it very simple just a drizzle of dark chocolate to cut the sweetness from the marshmallow :)


You will need:

10.5 oz. bag marshmallow 
4 tbsp butter
5 c Rice Krispies Cereal

Instruction: 

1. put the butter with the marshmallow in a pan on medium heat until it melts.

2. take the pan off the heat and add Rice Krispie Cereal, stir until the marshmallow glue stick all the cereal bits. (This is when you add the extras ingredients)

3. spray your pan that you want to put the mixer in with a cooking spray or brush it with butter to prevent its stuck in a pan because this stuff is very sticky. I use brownie pan but you can use whatever you want and press it very hard and very compact in a pan. ( butter or spray your hand as well )

4. leave it set about 30 minutes and you can cut whatever shape you want - squares, bars or even use a cookie cutter to cut a cute shape for your kids.


Next PostNewer Posts Previous PostOlder Posts Home